Archive for the ‘Recipes’ Category

Win-It-Wednesday: Ball Home Canning Discovery Kit

Tuesday, September 8th, 2015
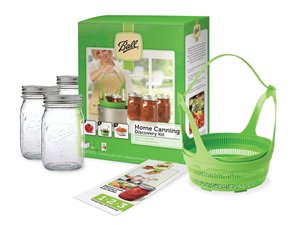
If you ever thought about canning, but thought it was too hard or complicated you need to hear about the Home Canning Discovery Kit from Jarden Home Brands, the makers of Ball Canning Jars.

Once a couple of years ago, I tried canning. But it was difficult to know where to start, what recipes to try and how to navigate the jars full of veggies and fruits in and out of the boiling water without burning myself, breaking the jars or making a mess.

That is why I am so excited that Jarden Home Brands sent to me their new Home Canning Discovery Kit along with a cookbook packed with tons of fabulous canning recipes (Caribbean Peach Chutney, Zesty Zucchini Relish or Sweet Apple Cider Butter anyone?) .

The folks over at Jarden Home Brands are the experts when it comes to canning and preserving. I love the way they make things so simple and basic. There’s no getting overwhelmed! The have a super website that has everything you need to know about canning fruits and veggies. The website goes over it all…  from getting started with canning, recipes, figuring out how much pectin (a naturally occurring carb found in fruits and veggies that aids in the gelling of your jellies and jams) you’ll need, and more.

The Home Canning Discovery Kit includes three (3) jars for fresh preserving with the lids and bands, a Beginners Guide Book to Canning and Recipe Booklet and the super-duper patent pending canning rack with lifter. The kit makes canning super easy and effortless.

I LOVE the canning rack and lifter. It makes lifting the cans in and out of the boiling water stress-free. Plus, it is small enough to store compactly and neatly… so there is no cumbersome contraption that I have to find cabinet space for. (And if you’re like me… my cabinet space is precious space!)

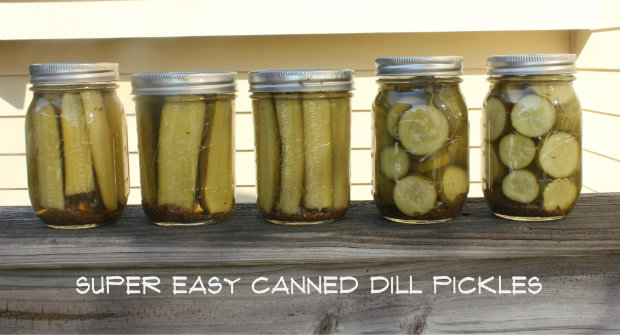
This past weekend I had an overflow of cucumbers in my garden, so I dug out my family’s super easy Classical Pickle Recipe and made several jars of Dill Pickles (for the recipe, photos and how-to’s make sure to check out my blog post!) This recipe is a great recipe for beginner canners, since it is simple to prep and assemble.
And… lucky for us… Jarden Home Brands is sponsoring this Win-It-Wednesday on BeFreeForMe.com!

A total of two (yes, 2!) BeFreeForMe.com members will be randomly selected to win The Home Canning Discovery Kit packed with three canning jars, recipes and how-to’s, along with the nifty Canning Rack with lifter, that I love so much! One (1) winner will be randomly selected from the entries received before Tuesday, September 15, 2015 at 11:59 PM EST, and one (1) more winner will be randomly selected to win from the entries received between Wednesday, September 16 and Tuesday, September 22, 2015 at 11:59PM. SO – make sure you enter two times to win!

How can you win?

Easy!

Reply to this blog and tell us what you would like to try to can (is it pickles, salsa, relish, jam or jelly?) or what canning recipe on the Jarden Home’s FreshPreserving.com website looks the best to you (Maybe it’s the Apple Jam, Antipasto Relish or Bread & Butter Pickles?)

Good luck, Remember if you think you Can, you CAN! And, as always …

Be Free!
Easy Canning: Classic Dill Pickles

Tuesday, September 8th, 2015

If I can… you can too! Today I tried my hand at canning and discovered that it is so easy… and fun!
My Grandmother and Mom use to can when I was a little girl. I remember enjoyed fresh tasting “right out of the garden” fruits and vegetables in the middle of the winter – and there is nothing in the world that beats it.

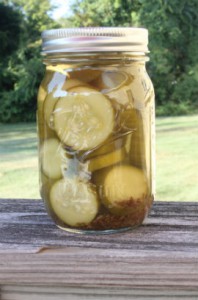
So, today I dug out my family’s tried and true Classic Dill Pickle recipe and with the help of my Ball Home Canning Discovery Kit, and an overabundance of pickling cukes from my garden, whipped up several jars of dill pickles in no time.

If you have never canned before, and are looking for a quick and easy recipe look no further than this recipe. It is quick, easy and convenient… and gluten-free! No mess, no fuss and a great way to enjoy fresh garden cucumbers all year round.

Classic Dill Pickles

Ingredients:

3 to 3 ½ pounds of pickling cucumbers

4 cups of water

4 cups of white wine vinegar

½ cup of sugar

1/3 cup of pickling salt

6 tablespoons of dill seed

Optional: 6-12 garlic cloves, halved

Directions:

Wash cucumbers well and cut off ends. Stand cucumbers upright next to canning jar to measure how tall they need to be to allow for 1/2 “ of space at top of jar. Cut to measure. Next cut the measured end of the cucumbers lengthwise into quarters for “spears” and cut end of the cucumbers into ½” “chips”.

In a large non-stick, enamel or stainless steel pot combine the water, vinegar, sugar and salt. Bring to a boil, stirring to dissolve sugar and salt.

Wash six to eight pint sized canning jars, lids and bands in hot soapy water. Rinse well.

Next place the cucumber spears and the chips into jars, arranging loosely and making sure that there is a ½” headspace at the top of the jars.

Add about 1 tablespoon of dill seed to each jar, along with 1-2 halved garlic cloves, if desired. Ladle the hot vinegar/sugar mixture into each jar, maintaining the ½” headspace. Wipe the rims of the jars with a clean dry cloth, place lids and hand tighten (not too tight!) the bands on each jar.

In a large stockpot boil water (enough to cover the jar with 1” of water). Once boiling place the jars in water (I love using the Handy-Dandy Ball plastic canning rack with lifter) and boil for 10 minutes (starting the 10 minute timer once the water returns to a boil).

Remove jars from water, place on wire rack and let cool. Once the jars are completely cool tighten bands. Let sit for 1 week at room temperature before serving.

Holiday Gift Idea: Gluten-Free Crunchy Chex Snack Mix

Monday, December 22nd, 2014

Eeeekks! Christmas is almost here… and if you’re like me you’re still looking for those “little something” gifts that you bring to holiday parties and have on hand for last minute gifting.
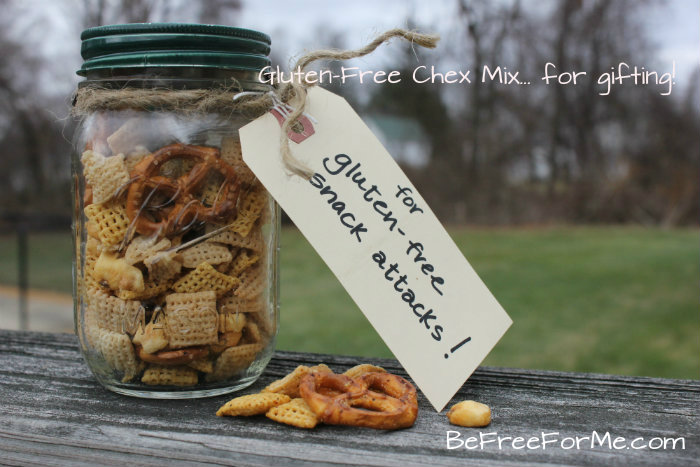
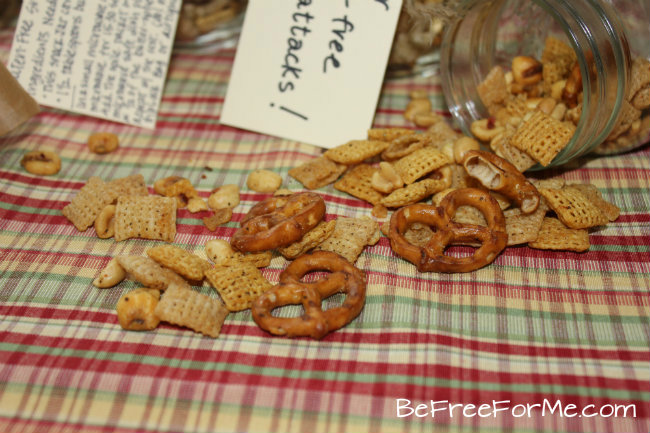
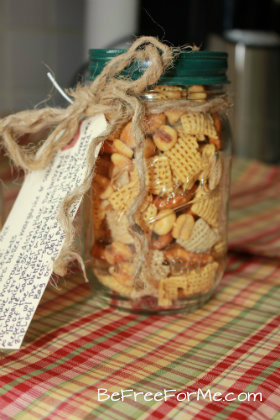
My Crunchy Chex Snack Mix is the perfect hand-made gift. By giving just the key ingredients and having the recipient make the snack mix themselves by adding melted butter, the shelf-life is longer than giving a prepared mix. However, you can also prepare the mix in entirety and give the snack mix “ready-to-eat” if you want too!

This single-serve snack idea has a cute-as-a-button presentation. It’s great for anyone on a gluten-free diet  since it’s simple to prepare and enjoy in an office, dorm room, or even right at home.

The only extra two things your gift recipient will need to make this salty snack is 1 ½ tablespoons of butter (or margarine, or butter substitute). So it is quick, easy and convenient. To make things easier for the recipient for when they make the mix, you can even include the parchment paper which is needed to cool the snack mix after its been microwaved – just roll the parchment and tie it with the twine on the outside of the mason jar. Anyone you give this gift to will appreciate your crafty thoughtfulness the next time a snack attack creeps up. Enjoy and happy gluten-free gifting!

Gluten-Free Crunchy Snack Mix

Supplies Needed:

Four (4) pint sized mason jars (I painted the tops for a more finished & festive look… but not necessary)

Four (4) snack sized ziplock bags, or small zip-top bags found in a craft store

Optional: Four (4) 20” lengths of Parchment paper (I used unbleached – I like the color better!)

Twine

Four (4) shipping tags for writing directions for preparation on the back… and a cute note on the front … I like “For Gluten-Free Snack Attacks” =)

Ingredients Needed:

1 ½ cup Corn Chex

1 ½ cup Rice Chex

1 cup mini gluten-free pretzels

½ cup corn nuts (Check label for allergens)

¼ cup salted peanuts (omit if concerned with a nut allergy)

½ teaspoon (heaping) garlic powder

1/4 teaspoon (heaping) chili powder

1/4 teaspoon (heaping) black pepper

1/4 teaspoon (heaping) of Mrs. Dash Lemon-Pepper Seasoning

1/4 teaspoon salt

1/8 teaspoon (heaping) of paprika

1 teaspoon red pepper flakes

Directions:

In a large mixing bowl combine the first five (5) ingredients. Toss gently to mix and distribute evenly in the four (4) mason jars, being careful to include the peanuts and corn nuts (which may fall to the bottom of the mixing bowl) into each jar. Leave about ½” on the top of each jar.

In a small mixing bowl combine the last seven (7) ingredients. Blend well. Evenly distribute into the 4 small plastic bags. Remove air from each spice bag, and seal well. Roll up and place on top of the each jar. Fill in extra room with additional Chex mix, peanuts, pretzels or corn nuts, if desired. Place cover on tightly.

If desired, fold the parchment paper in ½ lengthwise and roll into a tube. Tie each with a bit of twine.

With additional twine add the preparation directions that are written on shipping tags. (See preparation directions below).

Preparation Directions: (Include these with the gift)

Gluten-Free Snack Mix

Ingredients Needed:

Contents of this Snack Jar

1 ½ tablespoon of butter, margarine or substitute

In a small microwave bowl, place 1 ½ tablespoons of butter (or margarine or butter substitute) and microwave for 15-30 seconds, or until melted. Add the spice packet to the melted butter and mix well.

In a large microwave safe bowl place about ½ of the snack mix and add in about ½ of the melted butter-spice blend. Toss gently until the snack mix is well coated. Add in the rest of the snack mix and butter-spice blend, and repeat. Microwave for about 3 minutes, mixing 1/2 way through cooking time.

Place the Snack Mix on the parchment paper (or cookie sheet or tin foil) and let cool. Store in Ziplock bag or airtight container.

Gluten-free Apple Spice Cake with Creamy Butterscotch Caramel Cream Cheese Frosting

Thursday, October 30th, 2014

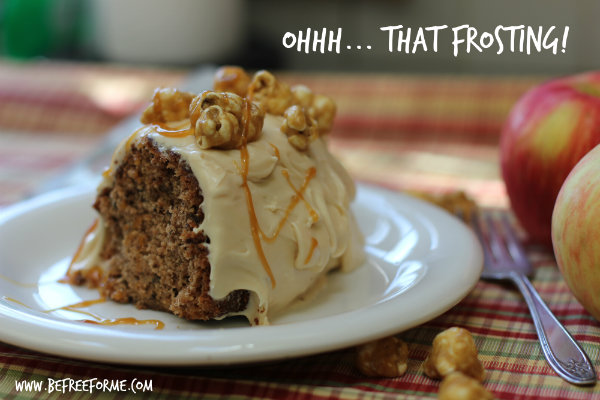
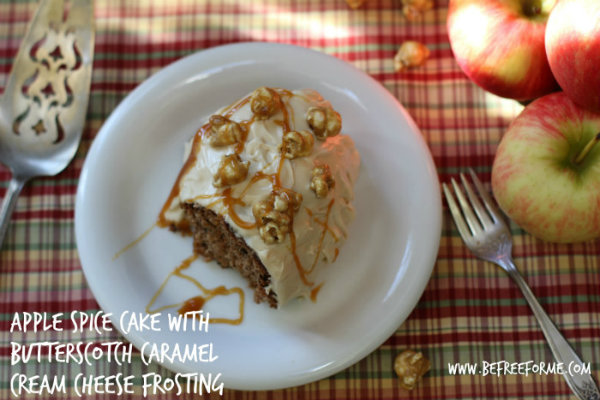
If you’re looking for a delicious, but easy, made-from-scratch cake that combines all the yummy flavors of the Fall you have to try this Apple Spice Cake that is topped with a creamy Butterscotch Caramel Cream Cheese Frosting.

The cake is easy enough, since it is made with an all-purpose gluten-free flour blend and applesauce, rather than fresh apples. No need for numerous measurings, peeling, coring and parings.

And the frosting… oh good lord… the yummy frosting. The creamy tartness of the cream cheese, is blended ever so delicately with the sweet Butterscotch Caramel to create a sweet and tangy frosting that is worthy of eating on its own. I made this cake in a tube pan, and was left with an abundance of frosting left over to enjoy by the spoonful (or you can make it in a sheet pan for a more traditional cake.) Any way you bake it or slice it, the result will be true yumminess.

For extra Halloween fun, top the cake with a handful of gluten-free caramel corn. Your goblins will gobble it right up!

Apple Spice Cake

Preheat oven to 350 degrees F.

Grease the pan and set aside (This cake can be made in a 9” tube pan or sheet pan )

Ingredients:

1 cup of granulated sugar (sifted)

½ cup (one stick) of butter (softened)

1 egg

1¾ cups of all-purpose gluten-free flour blend – sifted, with about 1/8 of a cup set aside

1 cup of golden raisins (or brown raisins if that is what you have on hand)

1 teaspoon baking soda

½ teaspoon salt

1 ½ teaspoon ground cinnamon

½ teaspoon ground cloves

1 cup of slightly sweetened apple sauce

¾ cup of walnuts (Slightly crushed. Note:  Easily crush the walnuts by putting them in a ziplock bag and press gently with the back of a serving spoon)

Directions:

In a large bowl, beat the butter until creamy. Slowly add in the sugar and continue to blend until light and fluffy. Next beat in the egg until blended.

In a small bowl, place the raisins and dust with the 1/8 cup of the gluten-free flour blend. Toss to coat. Set aside.

Add the baking soda, salt, cinnamon and clove to the remainder of the gluten-free baking mix. Slowly add to the butter/sugar/egg mixture and beat until well blended. Place the applesauce into a microwave safe bowl and heat about 1 minute in the microwave. Add the apple sauce to the batter, and beat again until just blended.

Next, add the flour-dusted raisins and the nuts into the batter and beat, on low speed, until blended.

Pour batter into the prepared pan and bake at 350 degrees for about 30-40 minutes. Watch cake carefully. The cake is done when a toothpick inserted in the center comes out clean.

When cool, remove cake from pan and frost with Creamy Butterscotch Caramel Cream Frosting. Top with a drizzle of Butterscotch Caramel Sauce and a sprinkle of Caramel Corn, if desired.

Creamy Butterscotch Caramel Cream Cheese Frosting

Makes enough frosting for a 2-layer cake.

Ingredients:

8-ounces of Cream Cheese or Neuchatel Cheese – softened

4 tablespoons (1/2 stick) or butter – softened

2 teaspoons vanilla extract

½ cup of Butterscotch Caramel Sauce /Topping, plus extra for drizzling over the top of the cake once frosted (I used Mrs. Richardson’s which is gluten-free!)

1-pound box of Confectioners’ Sugar (sifted)

Directions:

In a large bowl beat the cream cheese and butter together until smooth and creamy. Add the vanilla and the Butterscotch Caramel sauce continue to beat until well blended. Next slowly add the sifted Confectioners’ Sugar to the mixture and blend, on low speed, until mixed. After all the sugar is blended, put blender on high speed and blend for another 3 minutes.

Local Dairy – Good for our environment, health and economy

Wednesday, October 15th, 2014

It’s that time of year when the weather is perfect here in Boston. The air’s crisp, the sun’s warmth is worthy of extended smiles towards the sky and the colorful leaves provide the backdrop of color reminiscent of a photo in any old-time New Englander’s October calendar page.
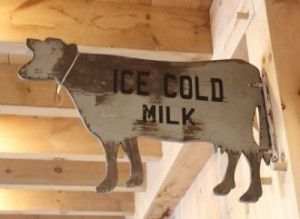
But it comes as no surprise that sometimes in the hustle and bustle of daily life I often don’t stop, take the time for that deep breath of refreshing air, close my eyes, look-up and give an all-out ear-to-ear smile.

But this past week I was given that chance. I was able to break-out of my stuffy office and experience firsthand how a small local dairy farm, Hornstra Dairy Farm in Norwell, Massachusetts, contributes to New England’s economy, health, environment and community. Thanks to the New England Dairy Promotion Board, myself and several other Boston area bloggers & foodies (Kara from The Foodie Dietician; Julia from Juggling with Julia; Liz from Meal Makeover Moms; Jen from Edible Boston; Julia from The Department of Agriculture for the State of Massachusetts) were invited to tour Hornstra Dairy Farm, named Massachusetts 2013 Dairy Farm of the Year. Not only was it a welcoming break from the 9-to-5 in the office, but it was an inspirational and enlightening way to learn first-hand about local dairy farming, and most importantly why local dairy farming is an integral part of our lives.

The tour was guided by John Hornstra, proprietor of this farm that has been a family-owned and operated business for four generations. John walked us through the start (milking) to the finish of the dairy production at his farm. (Our end of the tour treat? An impromptu morning ice cream party… *cough* *cough* … a little ice cream in the morning never hurt anyone, right?)

Although I learned that each cow is named (Yes, I met a few new friends named Meredith, Kathy, and J. Low) and milked, loved and treated humanely 365 days a year and the farms milk processing, pasteurization process and final products are top-notch (the Vat Pasteurization method is used during the processing of their milk), the biggest impression that John had on me during the tour was the Hornstra Dairy Farm’s legacy to commitment, quality and the love of New England’s families, environment and economy.

And although I don’t consider myself a city-slicker, after my visit to Hornstra Dairy Farm I now truly appreciate local dairy farmers, the beauty of their open spaces, the local culture, and everything that my beloved New England dairy farmers offers to make my family’s lives, health and well-being, well … just a better place to live. And that’s another reason for us all to give an all-out ear-to-ear smile.
Looking for some delicious gluten-free recipes using fresh dairy products? Check out these recipes from myself and fellow bloggers:

Tomato Salsa with Sharp Cheddar & Black Olive Crostini from BeFreeForMe.com

Pear & Maple Yogurt Cups from Must Be The Milk

Salted Caramel Peanut Butter Apple Dip from Kara at the Foodie Dietician

Peach Berry Milkshakes from Julia at Juggling with Julia

Sunday Morning Frittata from Edible Boston

Autumn Apple Quinoa Salad from Liz at Meal Makeover Moms

BeFreeForMe.com Video: How To Make a Gluten-Free Red Velvet Cake

Wednesday, February 12th, 2014
If you are looking for a perfect gluten-free dessert to make this Valentine Day, look no further than this video and instructions on how to make a Gluten-Free Red Velvet Cake that all your sweeties will love!

It seems that Red Velvet bake goods… cakes, cookies, donuts and more… has become all the rage over the past few years. But trying to find gluten-free versions of these treats could put you in a rage yourself.

So fret no more my little Valentines.

Now you can make one of these rich, creamy, and ever so pretty cakes right in your very own kitchen.

How sweet is that?

Want to print out the recipe? Check out this link in the BeFreeForMe.com’s Recipe Section.


Gluten-Free Red Velvet Cake — powered by ehow

Gluten-Free Cinnamon-Raisin Sticky Bun French Toast

Tuesday, December 17th, 2013

The boys were out plowing again this weekend, and I wanted to make them a breakfast that was extra special, really sweet and totally unexpected when they arrived home, cold and hungry,  after being out  working for most of the night.

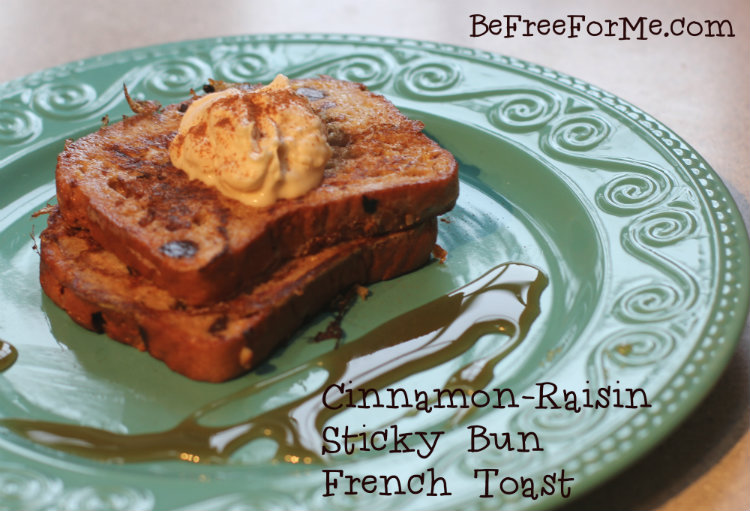
So into the cupboard & fridge I went and pulled out all the ingredients that are the most comforting, warm and heartening to me: Cinnamon, vanilla extract, maple syrup, cream cheese, butter and brown sugar. Then, without a doubt, I decided that the perfect breakfast would be Cinnamon-Raisin Sticky Bun French Toast.

Made out of the soft and cinnamon-y Udi’s Cinnamon-Raisin Bread, this French Toast adds a sweet, yet tangy, twist on an original French Toast recipe. The brown sugar in the bread’s egg wash makes for a caramelized edged finish on the perfectly toasted slices, while the cream cheese infused butter dollop creates a hint of tang that offsets any extra sweetness.

This recipe is delicious and a sure hit for any day…  No snow storm required.

———————–

Gluten-Free Cinnamon-Raisin Sticky Bun French Toast

Ingredients for the French Toast:

6-8 slices of Udi’s Cinnamon Raisin French Toast

4 eggs

¼ cup milk

¼ teaspoon ground cinnamon

1 tablespoon of Brownulated (pourable) brown sugar (I use Domino’s)

Butter, for skillet

Maple syrup – I use real maple syrup from Vermont (for drizzle)

Ingredients for the Cream Cheese Infused Butter:

2-ounces Cream Cheese

1½ tablespoon butter

1 teaspoon vanilla extract

2 tablespoons milk

Optional:

Additional Cinnamon for sprinkling on top of dollop

Crushed Pecans, for topping

Directions:

In a medium bowl whisk together the eggs, milk, cinnamon and brown sugar. Melt a pad of butter in a well heated frypan. Dip the Cinnamon-Raisin bread into the egg mixture until well-coated on both sides, and place in the skillet for about 1-2 minutes each side until browned and warmed through.

To make the Cream Cheese Infused Butter, beat the cream cheese and the butter together in a small bowl. Add in the vanilla and milk, and continue to beat until well blended. (Note: you can make this ahead of time, just keep it in the refrigerator until ready to use).

Serve the French Toast on a plate with a drizzle of maple syrup and dollop of the Cream Cheese Infused Butter. Top with a sprinkle of cinnamon, or crushed pecans, if desired.

Dig in. Enjoy.

Serves 3-4.

BeFreeForMe Video: How to Make Gluten-Free Thanksgiving Stuffing

Friday, November 22nd, 2013

With Thanksgiving next week, many of us our now putting our nose to the grindstone and hashing out exactly what our gluten-free menu will be for the Big Day.

And if your menu doesn’t  include Gluten-Free Stuffing, you need to check out this video, see how easy it is, and put it on your menu… pronto!

Now you can have your gluten-free feast with stuffing too!

Enjoy! Want to print out the recipe? Check out this link from BeFreeForMe.com’s Recipe Section.

(P.S. Make sure you make extra stuffing for Thanksgiving Sandwiches… Gluten-free bread, turkey, cranberry sauce, stuffing and mayo…  for next day leftovers! Yum.)


My gas grill copped an attitude: Gluten-Free Chicken Tenders Wrapped in Basil & Smokey Bacon

Friday, September 6th, 2013

Last night I was forced to face the hard-cold reality that summer is indeed over. Just as the days are getting shorter and the evening air a little nippier, the unthinkable happened: My Weber grill ran out of gas.
Yup… it ran out of gas. Just like that. As if to say, “I’m through. I’m done. Let that damn lazy oven do something around this place. Get your creative forces in high-gear, Kathleen. It’s September and I flippin’ quit.”

What a smartie-pant  troublemaker  that Mr. Weber can be.

Plate of raw chicken in hand, I wandered aimlessly back to the kitchen, turned the good ole’ faithful oven up to 350 degrees, opened up the refrigerator door and stood staring. Pondering. Begging my creative juices to start flowing.

I wasn’t ready for this. Where were the days of al fresco dining on the patio, laughing and tan with my margarita in hand while waiting for the gas grill to do all the work and basically cook dinner for me?

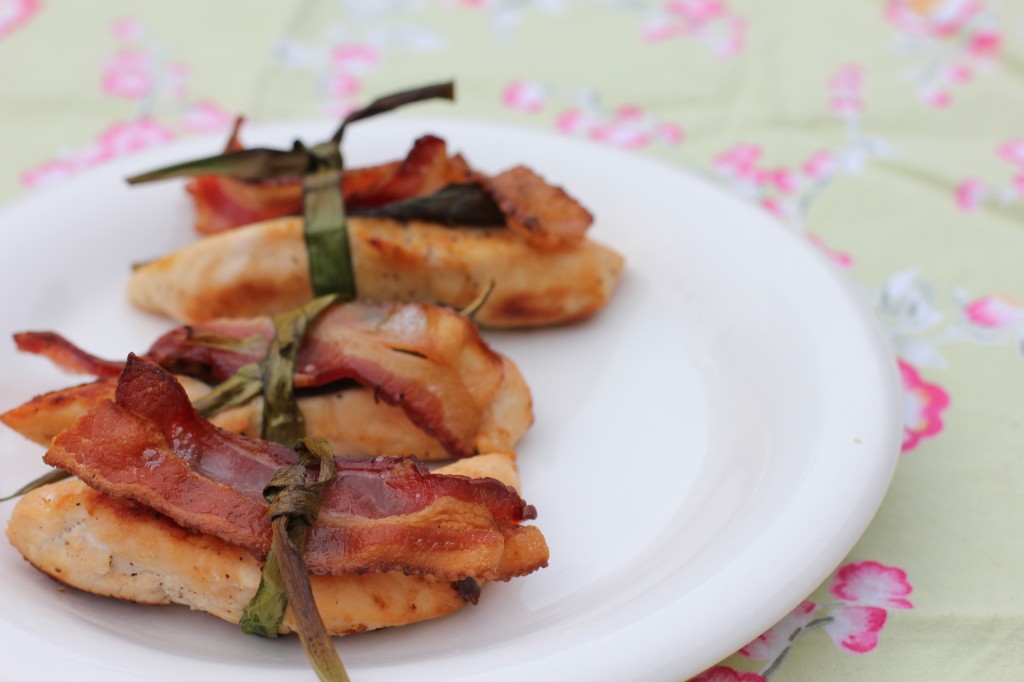
And just like the autumn leaves that are getting ready to descent, my next dinner creation creatively fell into place one delicious ingredient at a time. Chicken Tenders Wrapped in Basil & Smokey Bacon. Yum.

And for Mr. Weber? Yes…  I will be attacking his grates feverishly with a hard wire-brush this weekend (payback time, baby!). And maybe, just maybe, I’ll let him get all fired-up once again this year since I decided I can take the back-talking attitude especially when I have my faithful oven by my side.

And after all, a hot toddy on the patio while dinner is cooking is a perfect addition to a cool Autumn evening.

Chicken Tenders Wrapped in Basil & Smokey Bacon

1 ½ – 2 pounds of boneless and skinless chicken tenders (to yield about 1 dozen tenders) – about 4” long

1 tablespoon extra-virgin olive oil

Several slices of smoked bacon

Approximately 1 dozen fresh basil leaves, larger sized – washed and patted dry

One dozen green onions (the longer the better!) – washed and patted dry

Optional: Red Pepper Jelly, as a side for dipping

Preheat oven to 350 degrees.

Over medium heat, in a large skillet heat the olive oil. Add the chicken and cook, turning occasionally until almost done through. About 10-12 minutes.

While the chicken is cooking, place the bacon slices on top of a paper towel lined microsafe dish. Cover the bacon with a few more sheets of paper towels and microwave for about 3 minutes or until bacon slices are cooked about ½ way –  so they are still soft and pliable,. Remove from microwave, drain excess grease and let drain on clean paper towels.

On a large baking sheet, place the chicken tenders. Top with a basil leave, and wrap with a slice of bacon. Hold in place by wrapping with a green onion and tying a “knot” to hold.

Place in the preheated oven and cook for about 10-15 minutes, or until the chicken is cooked through.

Serve with a side of red pepper jelly, if desired.

Serves 4.

Coming Clean: A Simple Guide to Get You on the Road to Gluten-Free Clean-Eating

Sunday, March 3rd, 2013

It seems that everyone you talk to is trying to eat less. Trying to eat less fatty foods. Trying to try to lose weight.
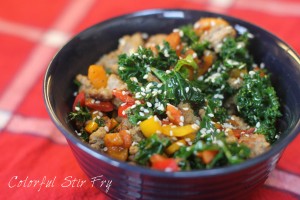
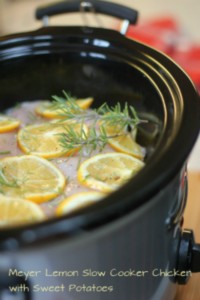
But instead of giving up the low-fat, low-calorie (and, as a result, low-flavor) foods I’ve chosen to become more aware of the foods that I am eating. To make my food choices simpler, and to really “get to know” my food – what is in it, where it came from, how it benefits and fuels my body.

Basically to clean-up my act when it comes to eating.

But I had questions about this buzzword “Clean Eating”. What does clean-eating really mean? Is it easy to follow? Is it expensive? Does clean eating fit into a gluten-free diet?

After a little research, I discovered that eating clean means eating foods that are whole and unprocessed. Foods like whole grains, lean meats, fruits, veggies and any food free of artificial ingredients, preservatives, sugars or trans and saturated fats. In other words – foods that are minimally processed.

Needless, I was thrilled to get an email from Attune Foods with link to their “Eat Clean: Gluten-Free Menu Guide” last month. This guide prepared by Alysa Bajenaru, RD is a great guideline and way to start off a gluten-free clean eating plan.

So… for the last few weeks I have been eating clean thanks to Attune Foods. They’ve come up with several clean eating diet plans specific to different dietary requirements:  A “basic” real food plan (for those with no allergies / intolerances), a vegetarian real food plan, and also a gluten-free real food plan (the plan that I followed).

I found the gluten-free clean eating diet easy to shop for, easy to prepare, and also easy to eat, thanks to the printable shopping list, recipes and tips to keep on track!  In fact I have found a few recipes (and the blogs that they came from!) that are now on my “keepers” list… recipes I will make over and over again.

“Eating clean” is also easier than expected, I think mostly because I am so use to reading labels and not being able to eat many processed foods due to celiac disease. I guess that celiacs are half-way there when it comes to following a clean eating lifestyle.

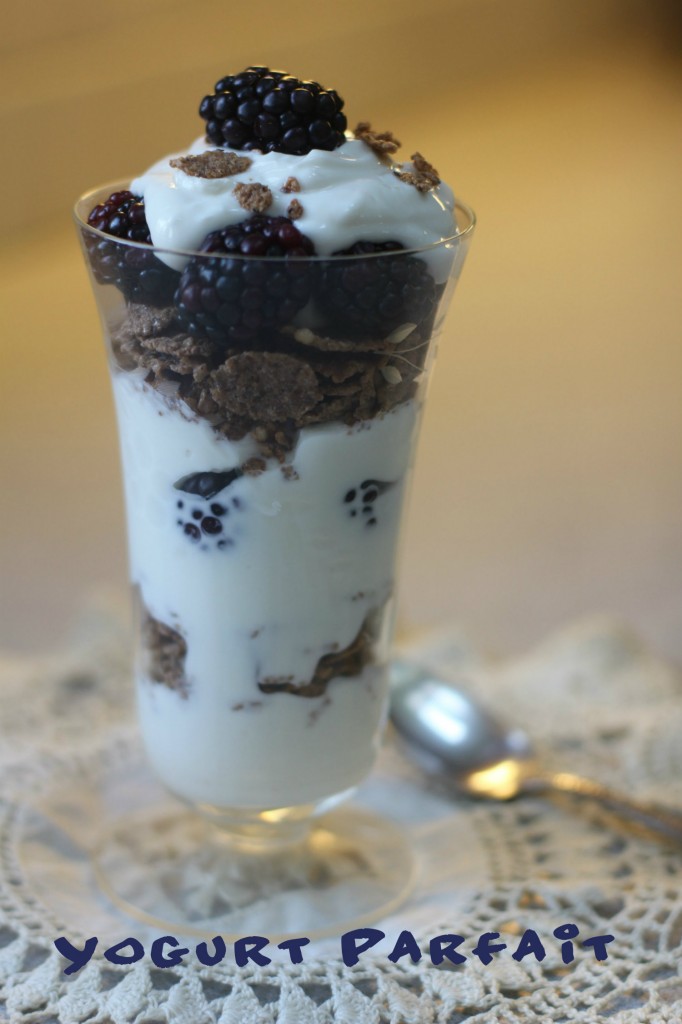
Some of my favorite recipes included the Colorful Stir Fry (my all-time favorite! ), Meyer Lemon Slow-Cooker Chicken with Sweet Potatoes, Maple Dijon Pork Tenderloin, and making up Breakfast Parfaits layered with Yogurt, Erewhon Buckwheat & Hemp cereal and Blackberries.

Come clean! Go ahead and give the Eat Clean Menu a try! Here are a few of my tips for those who want to follow this real food menu plan:
–    Consider shopping daily if only one or two people will be following the plan. You’ll find that you’ll have leftovers, and may not have to make a dinner each night.
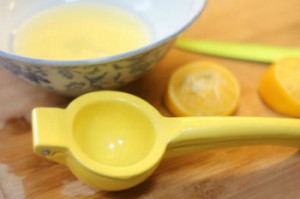
–    Invest in a citrus press (see photo below).  This gadget is my new “must have” gadget! I love, love this thing! The best $10 I ever spent. =) It was a godsend when making the Meyer Lemon Slow Cooker Chick Dish, and came in quite handy for adding a citrus zip into the numerous glasses of water I drank while on the plan. Which leads me to the next tip…
–    Make sure you drink tons of water while on the plan. It helps flush any leftover toxins out of your body, and as an added bonus, it will make your skin glow!
–    As always, read the labels when buying items from the shopping list. Items, such as the almond milk, can contain gluten.
–    Definitely splurge and spend the extra when it comes to buying the grass-feed beef. It makes SUCH a difference in flavor, compared to “regular” beef. The grass-feed beef tastes like beef use to taste when I was younger. It makes such a difference!
–    Don’t feel that you have to buy everything on the shopping list. Improvise and make substitutions! I couldn’t bring myself to spend $11.99 for the hemp hearts, so I passed on them; I bought regular almond butter that cost $5.99, instead of the organic at $13.99; I don’t really like mushrooms, so the cremini mushrooms didn’t make the cut to get into my shopping cart; Use soy yogurt if you have dairy allergies. Feel free to get creative with the recipes and customize them to fit your tastes, budget & allergies.


Be Free For Me Blog is proudly powered by WordPress
Entries (RSS) and Comments (RSS).