Posts Tagged ‘gluten-free frosting’

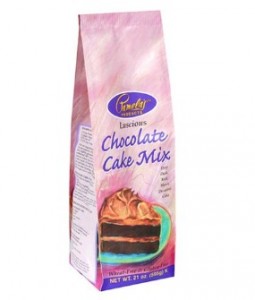
Friday Favorite: Pamela’s Luscious Chocolate Cake Mix

Thursday, January 26th, 2012

I love baking. The mixing, the blending, the smell of a good gluten-free goodies baking in the oven. I love to make sweets for myself, and for those in my life…  just because.
After all, cake isn’t just for birthdays. Celebrations should happen daily. Got a “B+” on that math test? Time to celebrate! Mom home from a business-trip after being gone all week? Time to celebrate! It’s the little things in life that are sometimes the most overlooked, yet those that bring the biggest joys into our lives. The kind of joys that put a smile on your face, and a bounce in your step.

And to celebrate these tiny joys, cupcakes made from Pamela’s Cake Mixes are perfect.

I love the convenience of adding just a few ingredients and mixing up a batch of gluten-free cupcakes.  Afterward I frost and decorate each one uniquely… for each special someone in my life. I learned early-on the perfection in decorating doesn’t matter one bit. After all, as the old saying goes… it’s just the frosting on the (yummy, gluten-free) cake… so go nutty-crazy with the frosting & sprinkles.

Celebrating every day wonders and joys are the reasons this week’s Friday Favorite on BeFreeForMe.com goes to Pamela’s Cake Mixes. Congratulations…and have fun celebrating!

Want to buy Pamela’s Cake Mixes on Amazon.com? Take advantage of FREE Super Saver shipping. Here are the links:

Pamela’s Products Luscious Chocolate Cake Mix, 21-Ounce Packages (Pack of 6)
Pamela’s Products Classic Vanilla Cake Mix, 21-Ounce Bags (Pack of 6)
Pamela’s Products Vanilla Frosting Mix, 12-Ounce Bags (Pack of 6)
Pamela’s Products Dark Chocolate Frosting Mix, 12-Ounce Bags (Pack of 6)

Get Yourself Into The Spirit… Make Some Sugar Cookies (Gluten & Nut-free)!

Tuesday, December 22nd, 2009

One sure way I get into the Christmas spirit is by cranking up the Christmas tunes, singing at the top of my lungs, and of course… making some frosted sugar cookies.

Not only does the kitchen get filled with a sweet aroma, but the creative juices get flowing while decorating and designing gluten-free cookies that are not only beautiful, but yummy to!

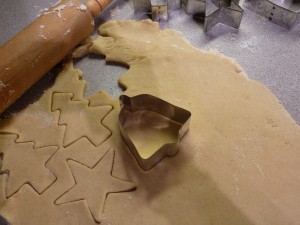
A fool-proof way to ensure the cookies get cut cleanly and precisely is to chill the dough prior to cutting. I chilled mine overnight, but a few hours in the refrigerator will do the trick. Another trick is to make sure that the cookies are cooled completely prior to frosting.

Following is the recipe for the cookies and the frosting glaze:

Jack’s Gluten-free Sugar Cookies

1/3 cup of butter, at room temperature
1/3 cup of shortening
¾ cup of sugar
1 teaspoon baking powder
¼ teaspoon salt
1 egg
1 tablespoon milk
1 ½ teaspoon pure vanilla extract
2 cups of gluten-free all-purpose baking flour – I used Bob’s Red Mill (Check label for allergens)

Beat the butter and the shortening together in a large bowl for about 1 minute. Add in the sugar, baking powder and the salt. Continue to beat until combined.

Next beat in the egg, milk and vanilla extract until mixed well.

Continue to beat, while adding a bit of flour into the batter at a time. Beat well after adding each addition of flour.

Divide dough into two pieces and wrap well in plastic wrap. Refrigerate for at least 2 hours, or overnight.

When ready to make the cookies, preheat the oven to 375 degrees.

On a well floured surface, roll out one plastic wrapped packages of dough. Roll out to about ¼ to ½”. Using cookie cutters, cut out cookies and place on an ungreased cookie sheet about ½” apart from each other.
Bake for about 6-8 minutes, until edges are just starting to brown. Watch the cookies carefully since they will brown fast! When finished, transfer to a plate or wire rack and let cool. Repeat process with the second package of refrigerated dough.

Let cool completely… if not overnight …. Before frosting!

Icing Glaze

1 box (or a pound) of confectioner’s sugar
3 tablespoons powdered egg whites (found in the baking aisle of the supermarket)
6-7 tablespoons warm water
Food coloring

Several small pudding dishes or paper bowls

In a large bowl, using an electric blender, mix together the sugar, egg whites and the water. Beat for about 6 minutes until mix becomes slightly thickened, and less watery than the start.

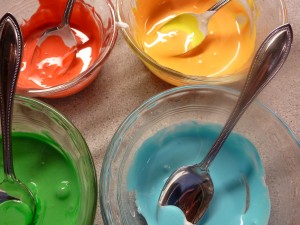
Place a bit of the icing in each bowl and mix in food coloring to make the desired colors for the cookies you are frosting. (Note: the more colors you mix up the more creative you will get!)

Spread a super-thin layer of the “base” color (i.e. a snow mans based color would be white) on each cookie using a small spoon or rubber spatula. Let dry completely before adding on other complimentary colors (i.e. carrot orange nose, charcoal colored buttons, red scarf) with a thin tool, such as a tine of a fork. Let dry completely before stacking on top of each other.


Be Free For Me Blog is proudly powered by WordPress
Entries (RSS) and Comments (RSS).